INTERNATIONAL SHIPPING AVAILABLE, RATES CALCULATED AT THE CHECKOUT - 30 day change of mind returns
INTERNATIONAL SHIPPING AVAILABLE, RATES CALCULATED AT THE CHECKOUT - 30 day change of mind returns
Add description, images, menus and links to your mega menu
A column with no settings can be used as a spacer
Link to your collections, sales and even external links
Add up to five columns
Add description, images, menus and links to your mega menu
A column with no settings can be used as a spacer
Link to your collections, sales and even external links
Add up to five columns
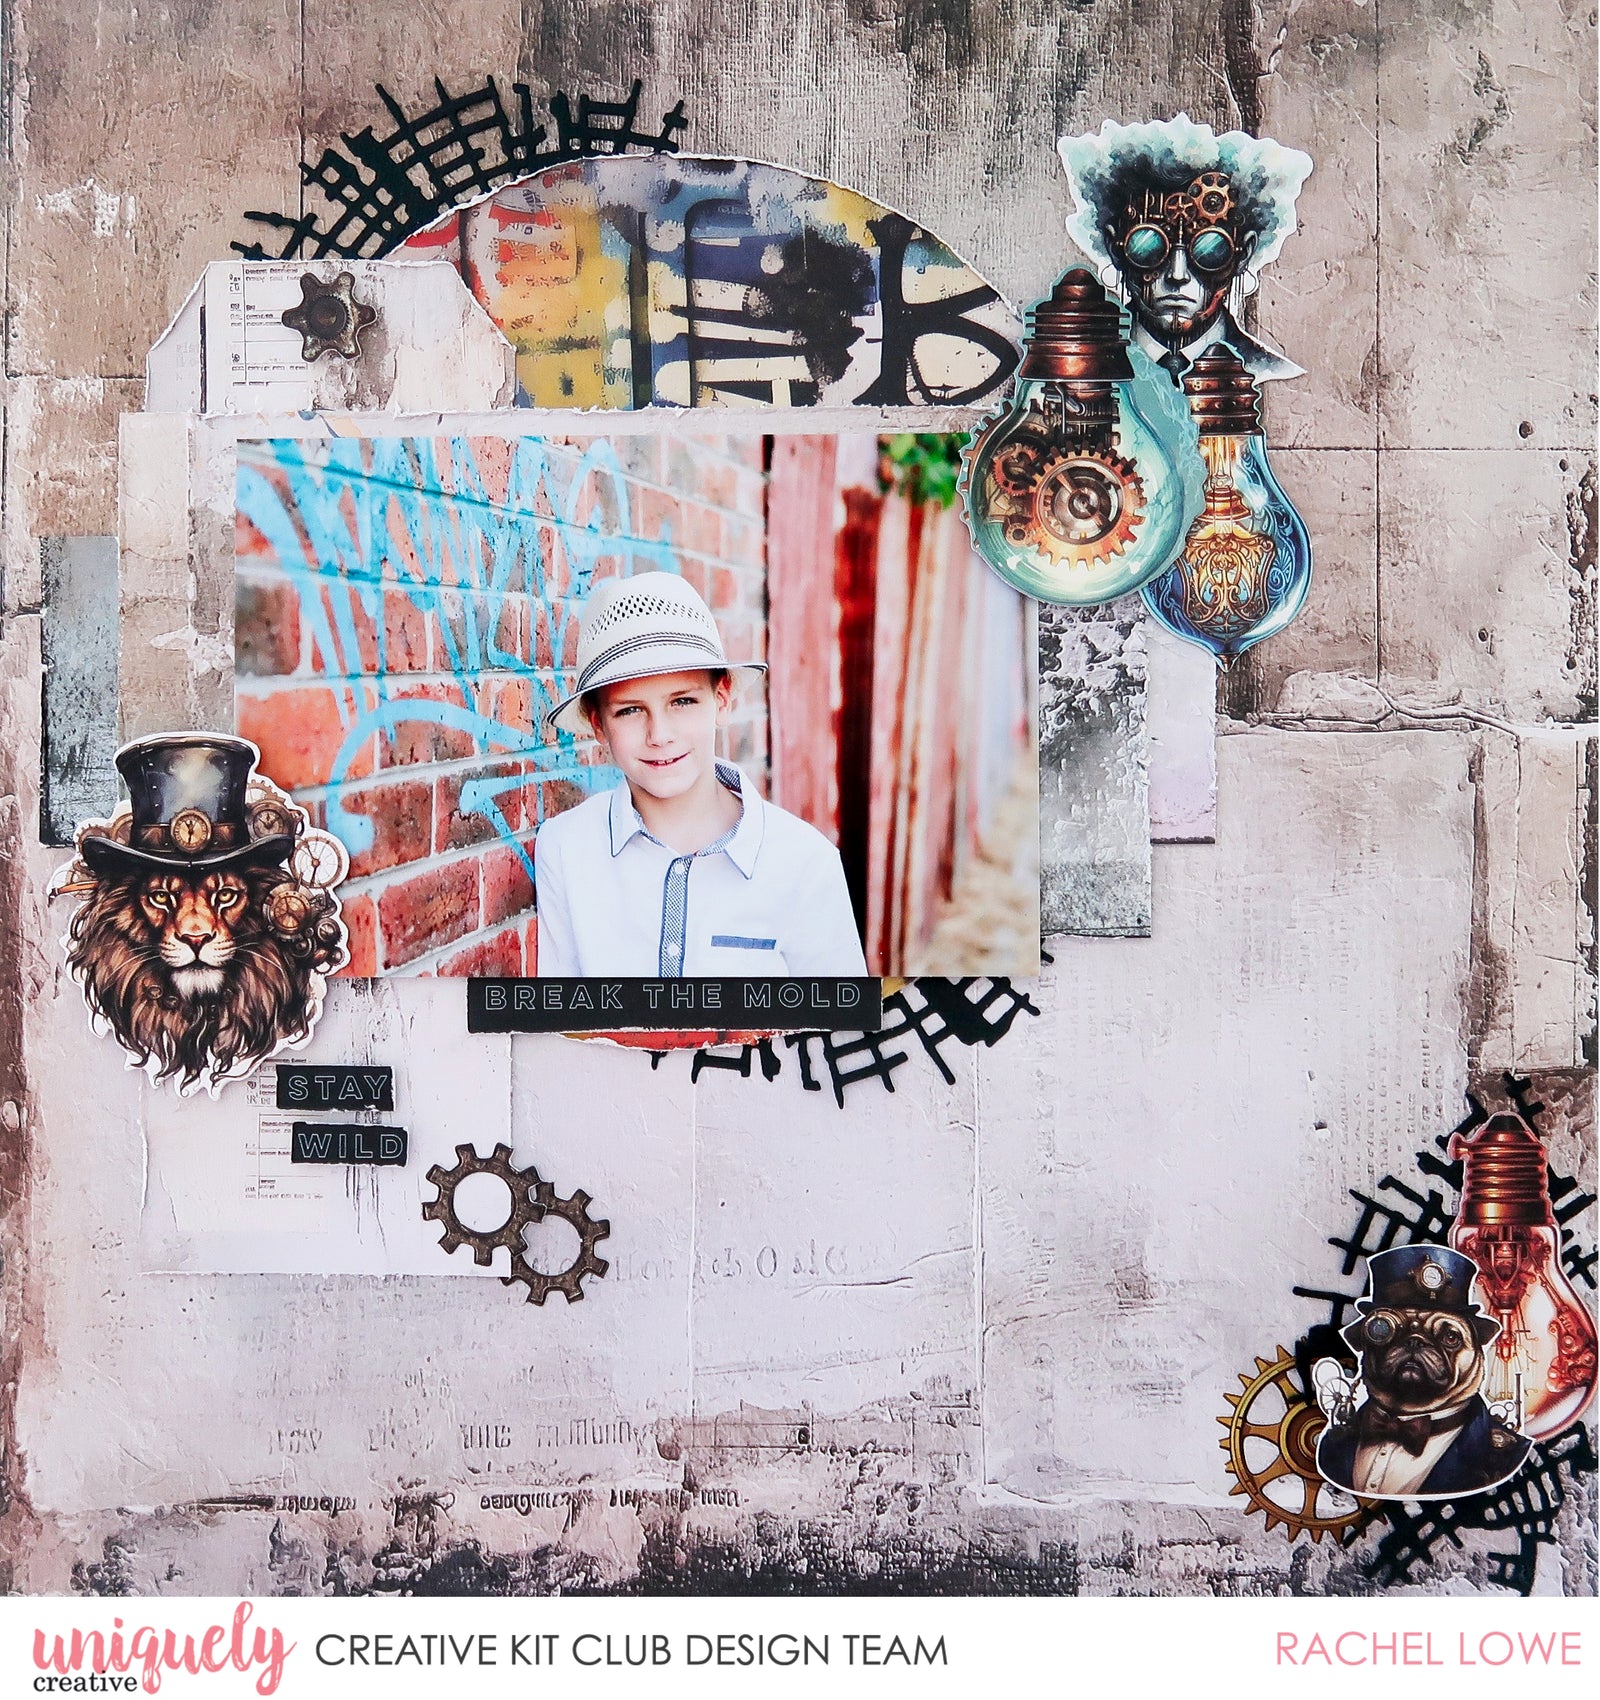
BREAK THE MOLD SCRAPBOOKING LAYOUT TUTORIAL - RACHEL LOWE
August 26, 2024

Shop the products
Uniquely Creative Products Used:
- UCP2766 Retro paper
- UCP2767 Tinker paper
- UCP2771 Urban paper
- UCP2772 Cyberpunk paper
- UCP2773 Steampunk Graffiti Creative Cuts
- UCE2020 Steampunk Graffiti Dimensional Stickers
- UCD2150 Urban Graffiti die
- UCE2019 Steampunk Rub-ons
Other Products Used:
- Double-sided tape
- Trimmer,
- Glue
- Scissors
Instructions:
-
Use Retro paper as your base paper.
-
Cut a 7 inch circle from Alleyway paper Graffiti side
-
. Cut a 2.5 x 4 inch strip from the Tinker paper (avoiding the graphic)
-
Cut a 4 x 7.5 inch strip also from Tinker paper (avoiding the graphic)
-
Cut two of the Urban Graffiti die in black cardstock. Cut in half so you can add each half under the top and bottom of the circle paper piece. Set the other one cut side.
-
Cut the Tags from Cyberpunk paper.
- Put you paper pieces together on the base paper as in diagram below. I placed my tag on the first narrow paper strip and added the larger paper piece over the top of the tag. – See image 1.

-
I found Cog die cuts and added to my tag as below.– See image 2.

-
I next added my 6 x 4 inch landscape photo, off centre to add visual interest.
-
I created an embellishment cluster to the left of my photo, I added the Lion die cut with foam tape. I then added phrase sentiment die cuts, on the actual tag and the other tucked under the photo.
-
I created a second embellishment cluster to the top right of my photo, I used two die cuts and then the top cog light bulb is from the Dimensional Sticker sheet. - See image 3.

-
I created a third and final embellishment cluster to the bottom right of my background paper. I cut the Urban Graffiti die that I cut in black cardstock in half and adhered with wet glue. I added a metal clog from the Rub-on pack, layered a die cut bulb and finished off by adding the bulldog which I fussy cut from the Urban paper which I added with foam tape. See image 4.

Leave a comment
Newsletter
Join our mailing list and never miss an update …
