Early Years School Layout Tutorial - Lisa Amiet

Uniquely Creative Products Used:
- UCP2493 Science Lab
- UCP2494 Bookshelf
- UCP2497 Top of the Class
- UCP2498 Teacher Appreciation
- UCP2491 Numerical Equation
- UCP2501 Creative Cuts
- UC1866 Texture Circle mini stamp
- Cut-apart sheets
- Wooden Alphabet Embellishments
Other Products Used:
- Trimmer, scissors
- Adhesive tape, glue
- Black ink pad
- Acrylic stamping block
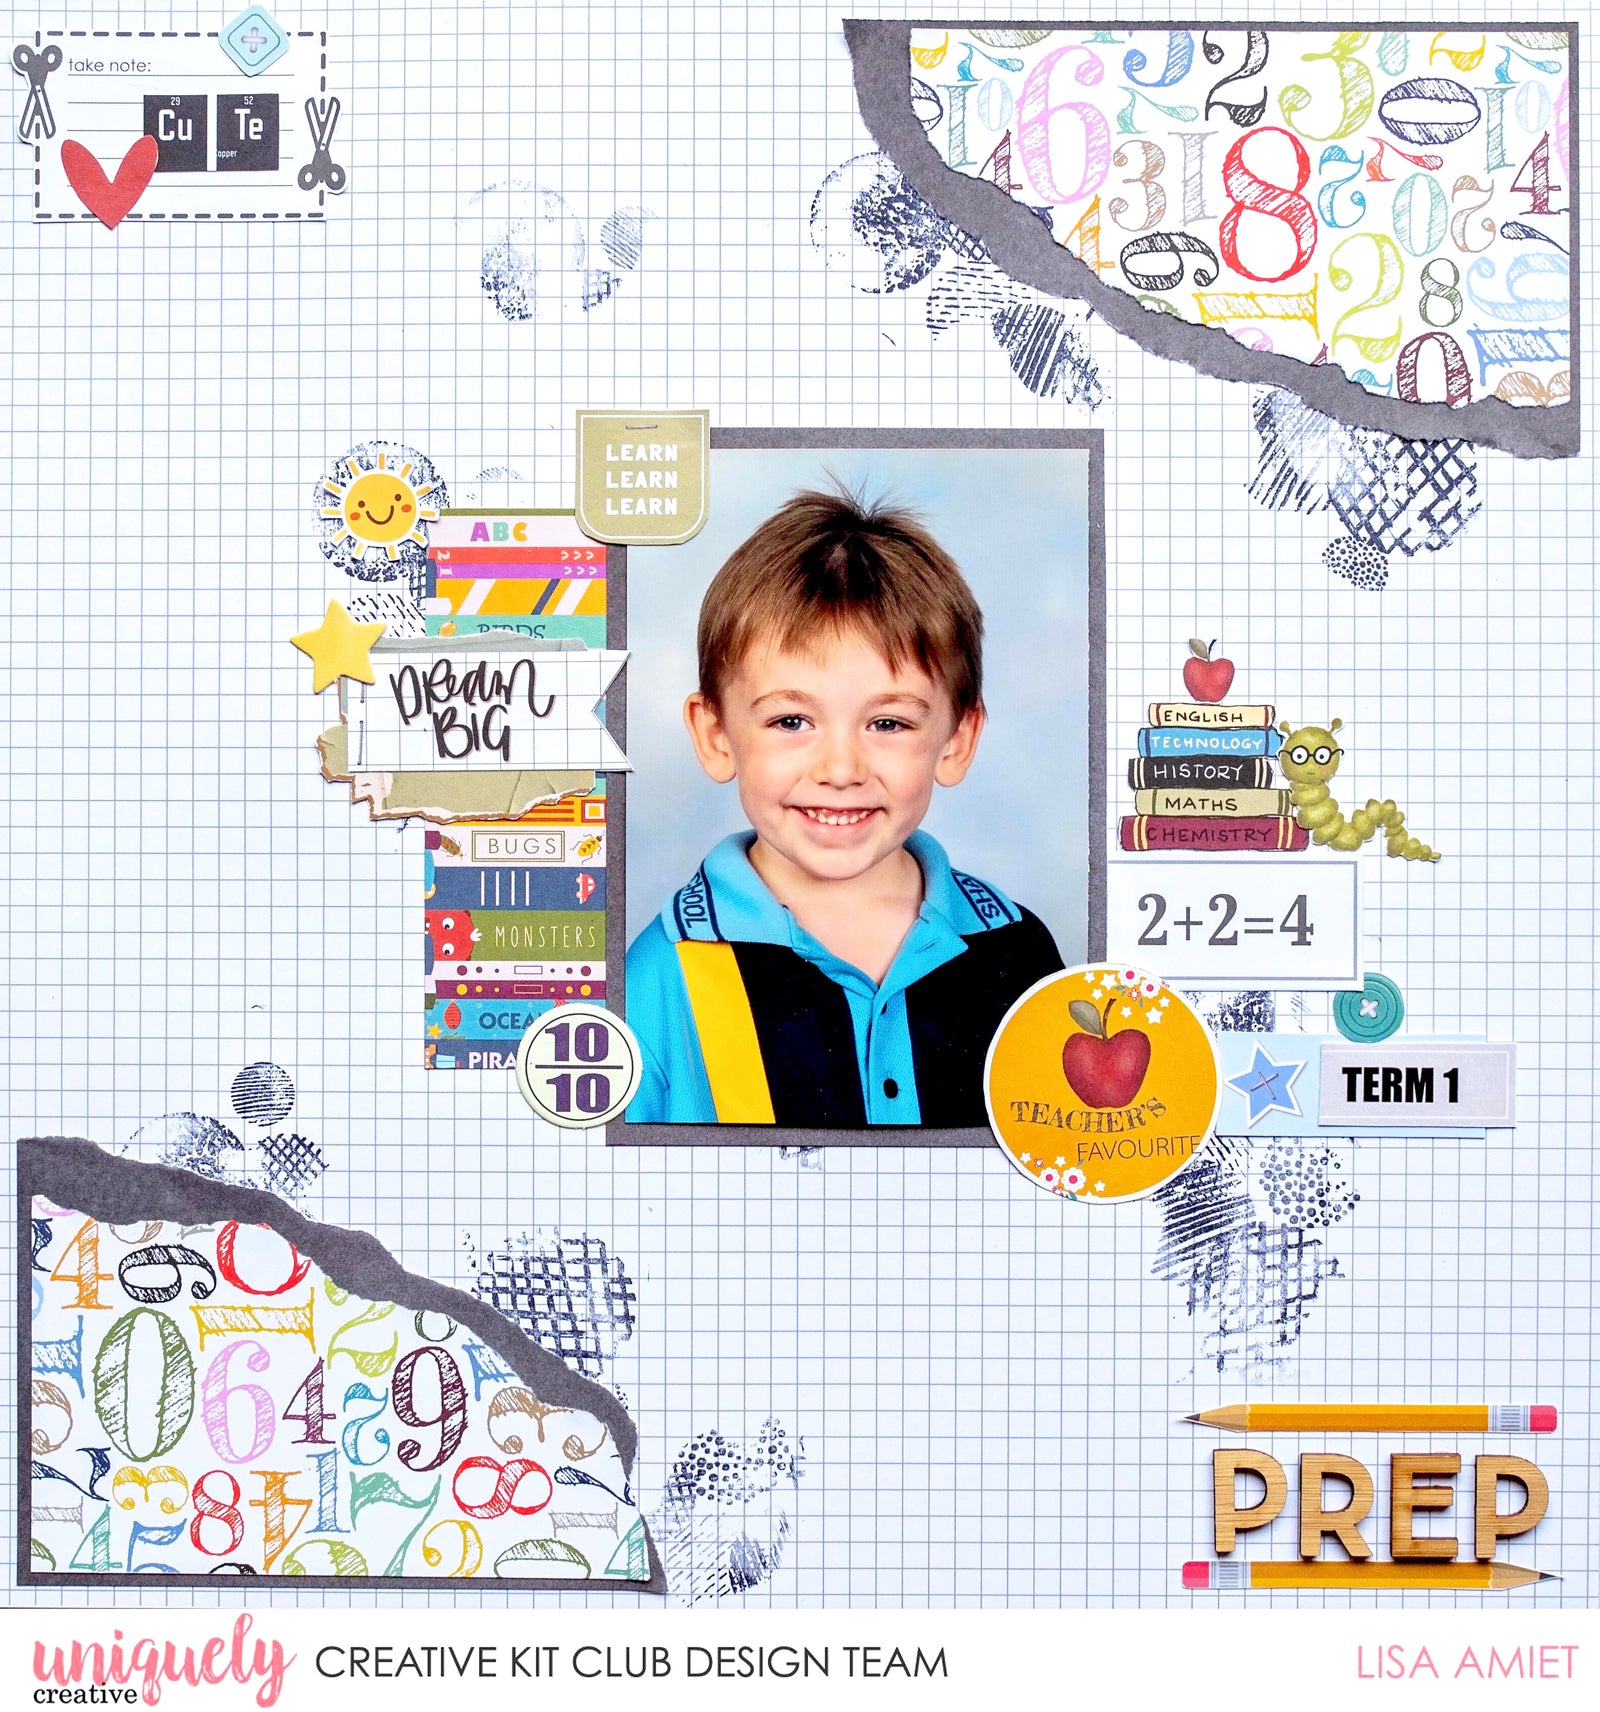
Instructions:
1. Use Science Lab paper as your base for this layout. Use the Texture Circles Mini Stamp and black ink to stamp random parts of your base paper. Tear the corners from Numerical Equation paper, using all four corners, 2 from each side, with the black ones slightly larger than the number corners. Adhere number corners to black corners, and adhere to top right and bottom left corners, leaving a small border around the edge.

2. Cut a 3 ¾ x 5 ¼” piece from Numerical Equation paper, matt and adhere photo to the black side of this piece. Cut a 2 ½ x 4 ¼” of Bookshelf paper. Adhere Bookshelf paper and your matted photo to the centre of your page, overlapping them.

3. Fussy cut elements from Top of the Class and Teacher Appreciation papers to build bottom right corner cluster. Adhere pieces, overlapping slightly.

4. Use fussy cut elements from Teacher Appreciation paper, Cut Apart Sheets and Creative Cuts, layering over previous pieces, to the left side of your photo. Adhere Creative Cut elements to bottom left corner of photo.

5. Fussy cut pencils from Top of the Class paper and adhere to bottom right corner, using the Wooden Alphabet Embellishments to spell out the grade, in this case I used Prep.

6. Fussy cut scissor note element from the Top of the Class paper and adhere to top left corner of page. Fussy cut cute element from Science Lab paper, and heart and button from Top of the Class paper and adhere to note, layering pieces.
