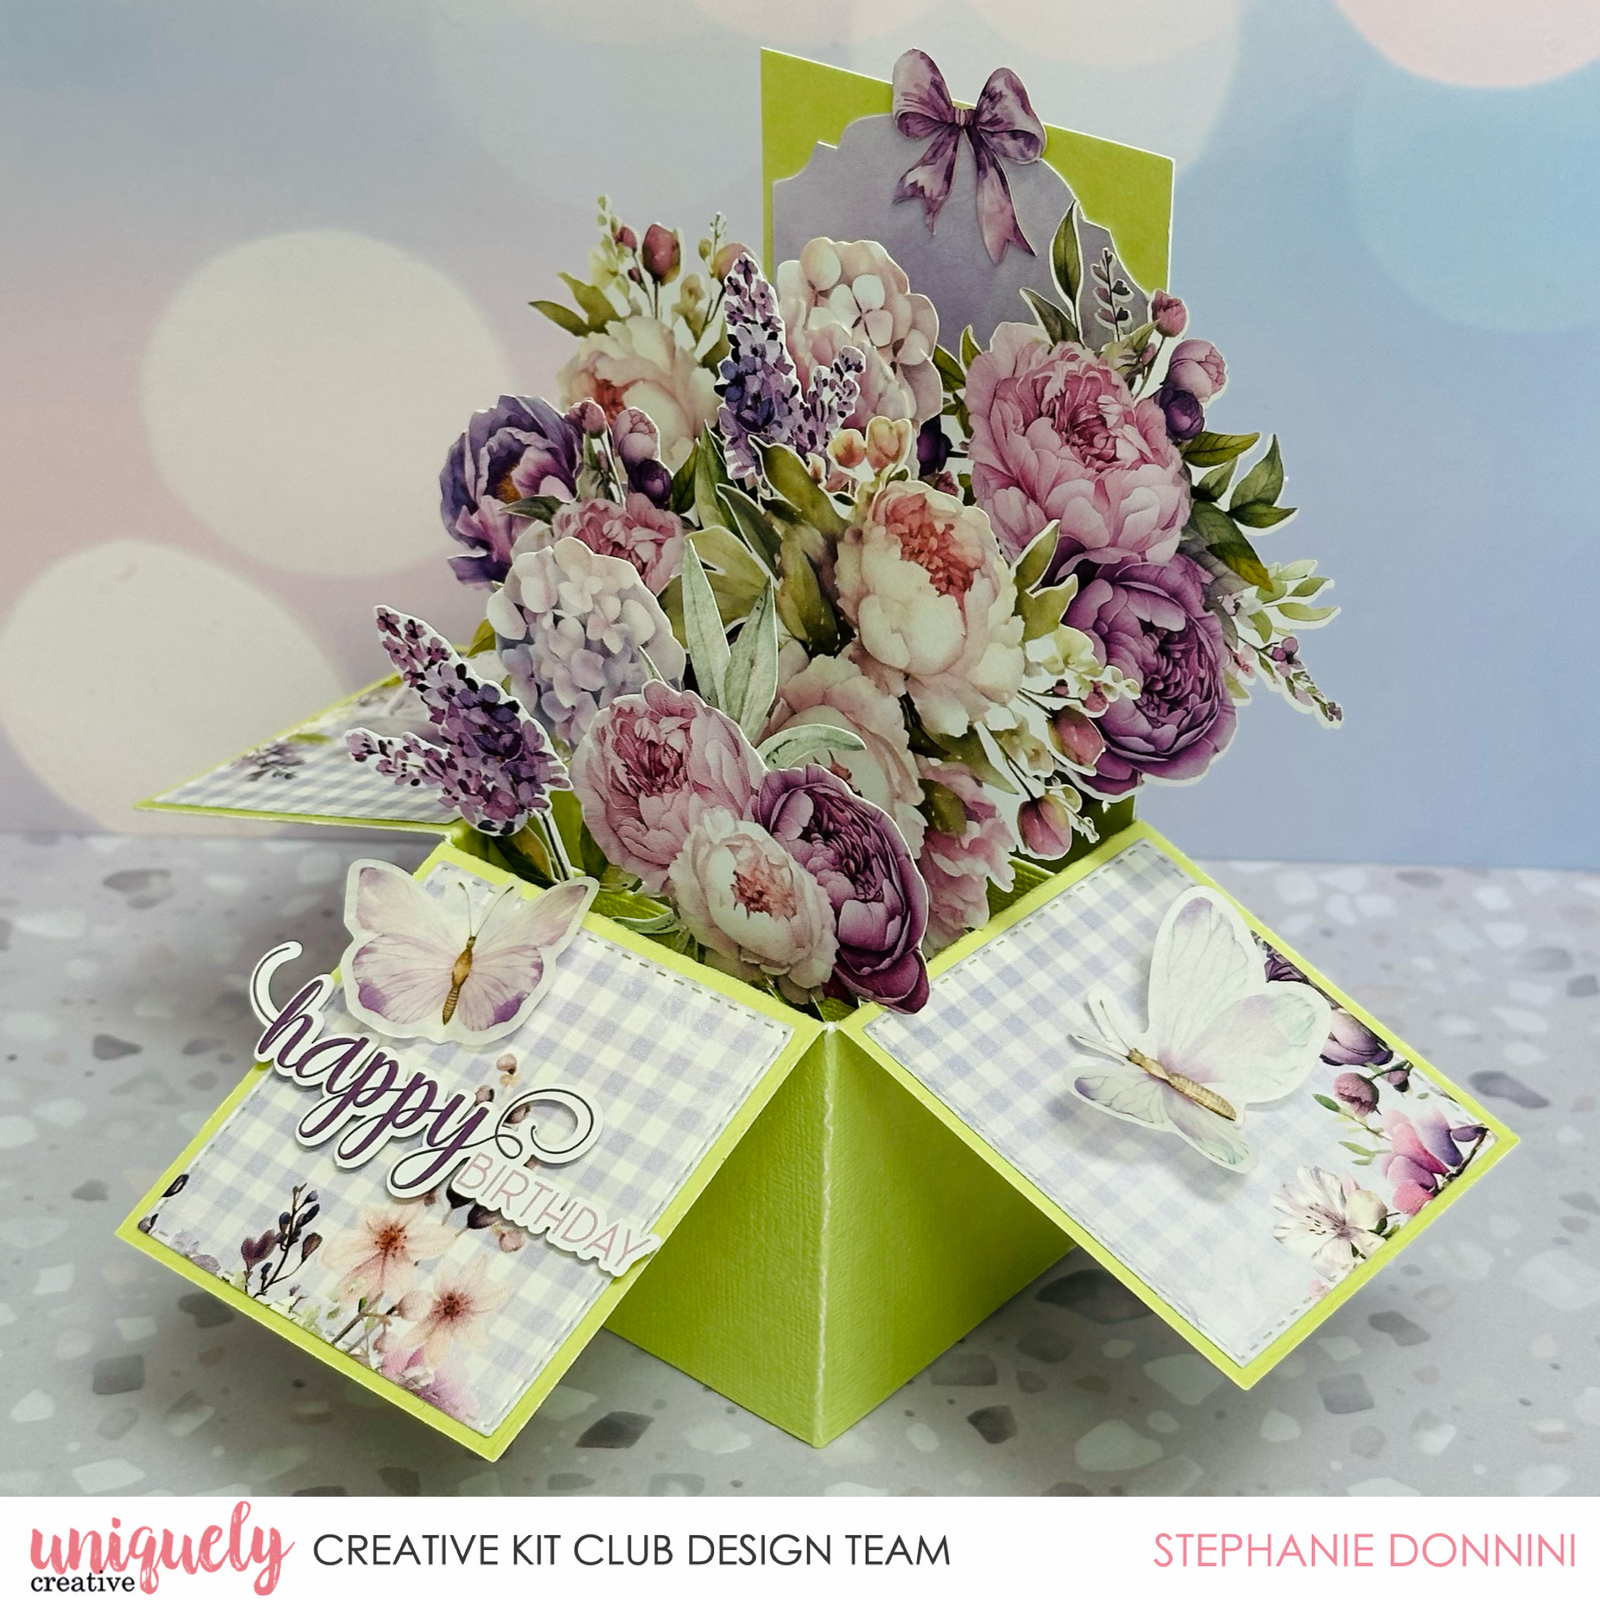
POP-UP BOUQUET CARD TUTORIAL - STEPHANIE DONNINI

To recreate this gorgeous pop-up card created by Design Team member Stephanie Donnini you will need the products listed below:
Uniquely Creative Products Used:
UCP2879 Serenity 12x12 Collection pack
UCP2894 Serenity Creative Cuts
UCP2895 Serenity Vellum Creative Cuts
UCD2177 Pop-up Box Card maker Die
Other Products Used:
Double sided tape
PVA glue
Clear acetate
UC Avocado cardstock
Instructions:
Step 1:
Using the pop-up box die set, cut two of the square frames out and one set of strips. Cut this out from heavyweight cardstock. 
Step 2:
To assemble the box, start by glueing the two main square pieces together by one of the tabs. Fold back three of the box flaps and leave the back flap straight. Enclose the box by gluing the second tab. Lastly, glue all the strips across the top of the box 
Step 3:
Cut three stitched squares from patterned paper and glue to the front three flaps. Fussy cut a decorative panel from the Serenity collection pack. To give the back panel extra height glue this to a strip of heavyweight cardstock 6.4cm x 12cm. Insert this strip and glue to the back of the box. 
Step 4:
Fussy cut flowers from the collection pack to form a full bouquet. Attach clear acetate strips (these were sourced from packaging scraps) to the flowers using double sided tape. 
Step 5:
Adhere the flowers in the pop-up box onto the three strips. Start building your bouquet from smallest to tallest to create extra depth and dimension. 
Step 6:
Finishing touches are to add a Happy birthday sentiment to the front panel, along with some vellum butterflies. Keep the plastic backing on the butterflies, fold the wings in half and they will hold their position beautifully. 


2 Responses

Karen
March 19, 2025
Love this box card. Especially the green base. It really gives it a pop of colour and it is so full. TFS