Our Warehouse is Now Closed for Christmas - All Orders will Ship from 7th January 2026
Our Warehouse is Now Closed for Christmas - All Orders will Ship from 7th January 2026
Add description, images, menus and links to your mega menu
A column with no settings can be used as a spacer
Link to your collections, sales and even external links
Add up to five columns
Add description, images, menus and links to your mega menu
A column with no settings can be used as a spacer
Link to your collections, sales and even external links
Add up to five columns
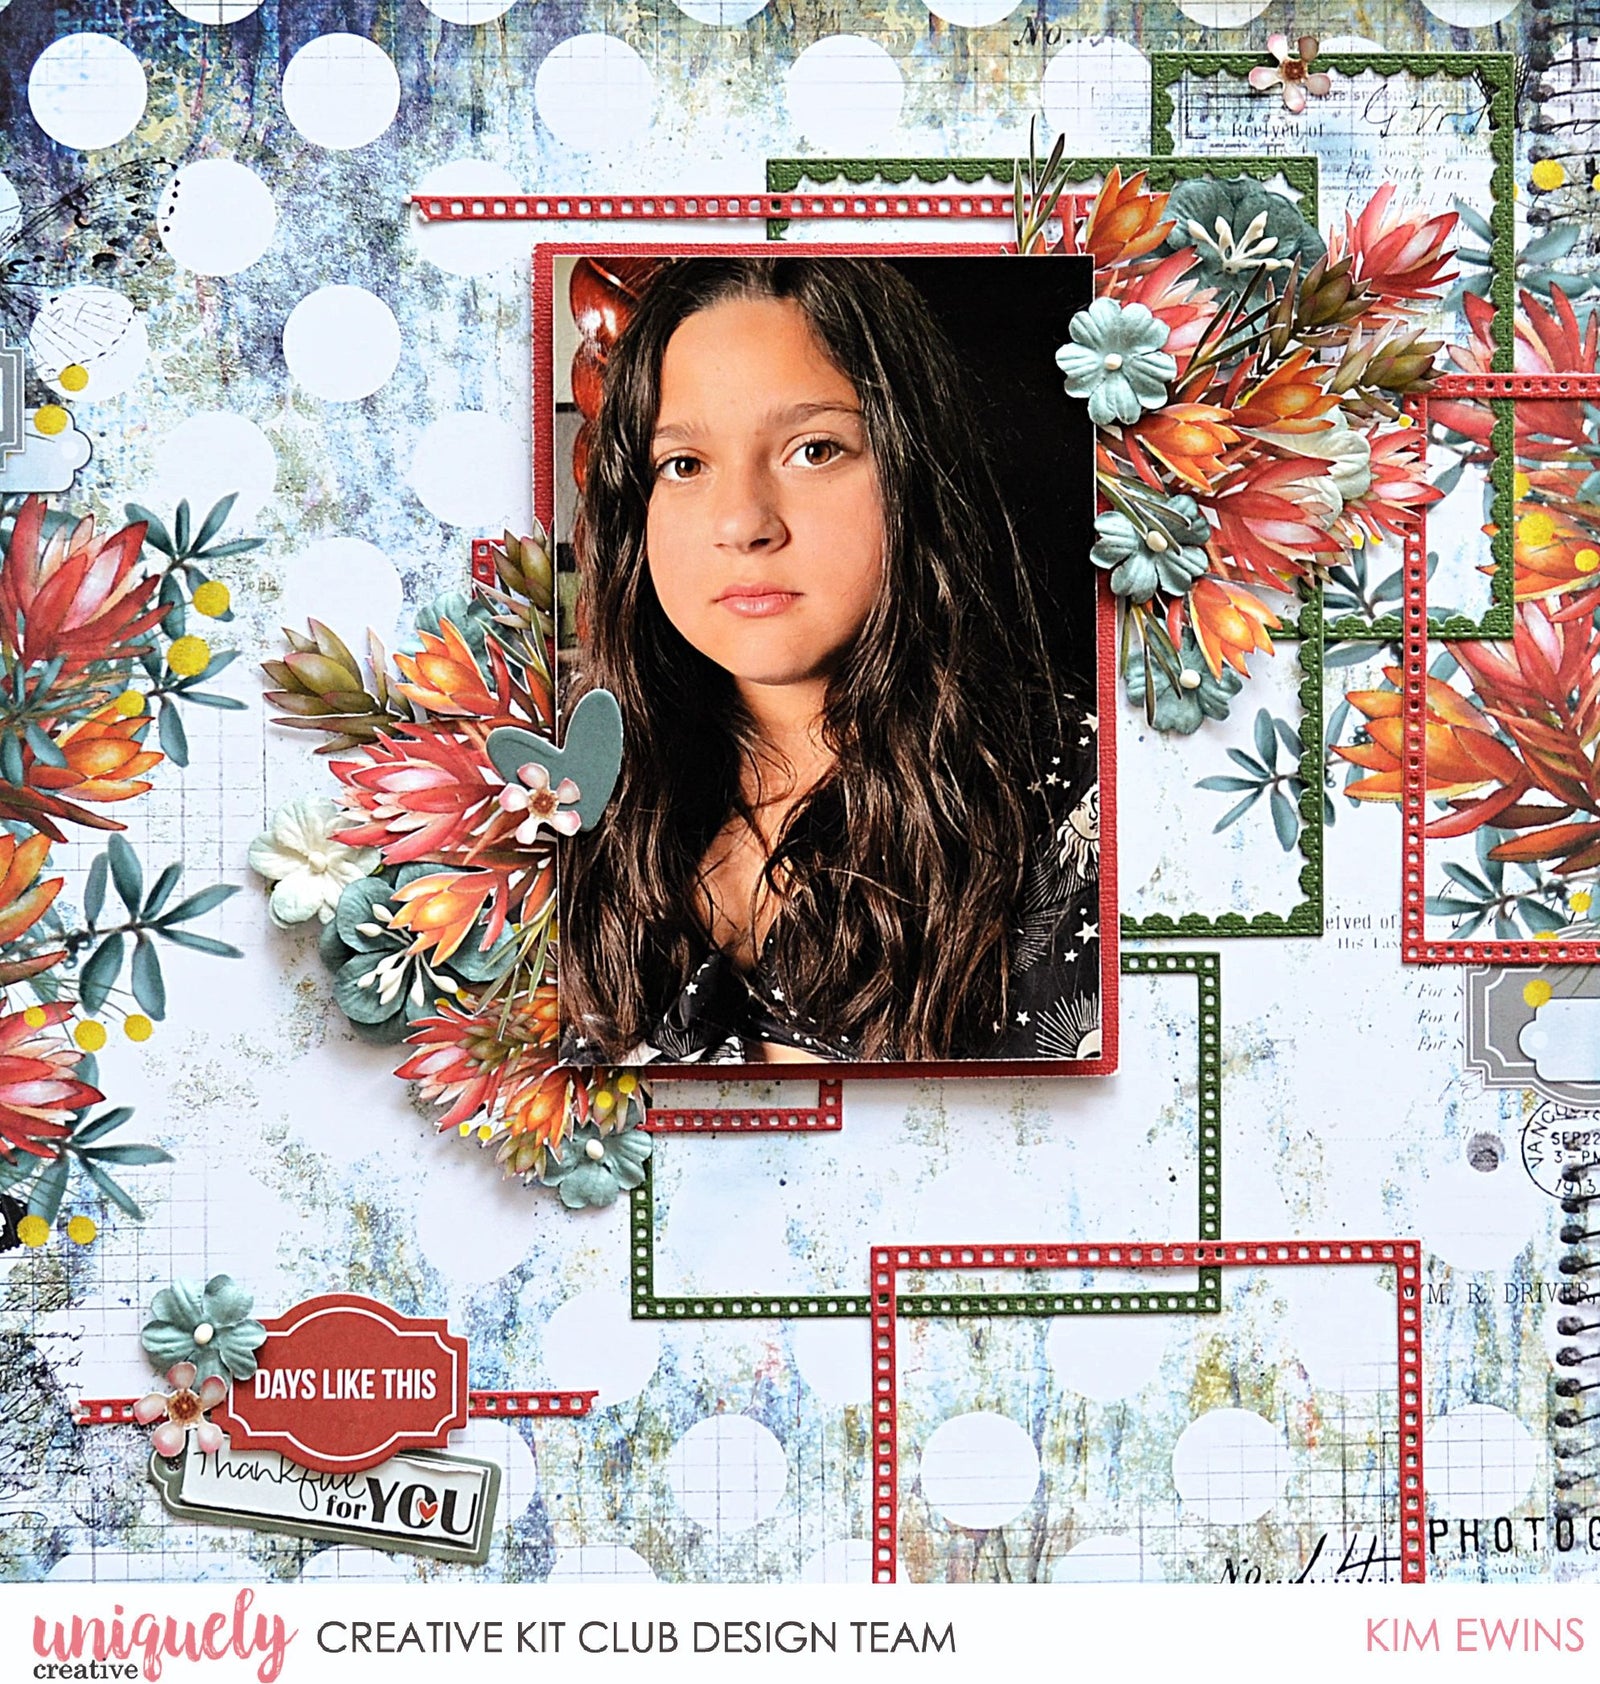
Thankful For You Tutorial - Kim Ewins
April 08, 2023

Uniquely Creative Products Used:
-
UCP2534 Great Outdoors UCP2532 Country Bloom -
UC P2540 Bushland Boutique Creative Cuts -
1 2 x 12 Cardstock – Brick Wall -
12 x 12 Cardstock – Fir Tree -
UCE 1816 Teal Flowers Lacey Frame Die -
Native Frame Die
Other Products Used:
- Trimmer
- Scissors
- Double sided tape / glue
- Due cutting machine
- Cardboard or foam mounts
Instructions:
1.
2. T
3. Take one of the large brick wall frames and tear it to give you 2 straight strips.
4. Using the fir tree cardstock and the native frame die, cut one of each of the small frames.
5. Using the lacey frames die and the fir tree cardstock, cut out one each of the large frame and one of the smaller frames.

6. Grab the sheet of the Great Outdoors paper, arrange and stick the frames onto the paper.


8. Cut a piece of cardboard smaller than the photo and stick in on the back of your photo.
9. Take a section of red brick cardstock and create a matt for your photo. If using a 6" x 4" photo, cut a piece measuring 11cm x 16cm. Lightly distress the edges of the matt.
10. Stick your photo onto the matt, making sure it is centered.
11. Cut another section of cardboard and add to the back of the matted photo.
12. Stick raised and matted photo in place on your page, 5cm down from the top then into the centre of your page.
13. Stick fussy cut protea clusters to the top right hand side of your photo and the bottom left hand side. Tucking them between the layers of the raised and matted photo.
14. Take a selection of teal flowers and tuck them in and on top of the clusters.
15. Grab a teal heart from the creative cuts pack and stick in place on the left hand side of the photo. Also, stick down a single pink flower on the left hand side of the heart.
16. Select a couple of sentiment tags from the creative cuts, stick small pieces of cardboard or foam mounts to the back, glue to the frame strip, stuck down on the bottom left of your layout. Add a teal flower and a sweet pink flower to the left of the sentiments. (If a tag sentiment isn't quite right for your layout, trim down another sentiment and layer on top of the tag)

Leave a comment
Newsletter
Join our mailing list and never miss an update …
