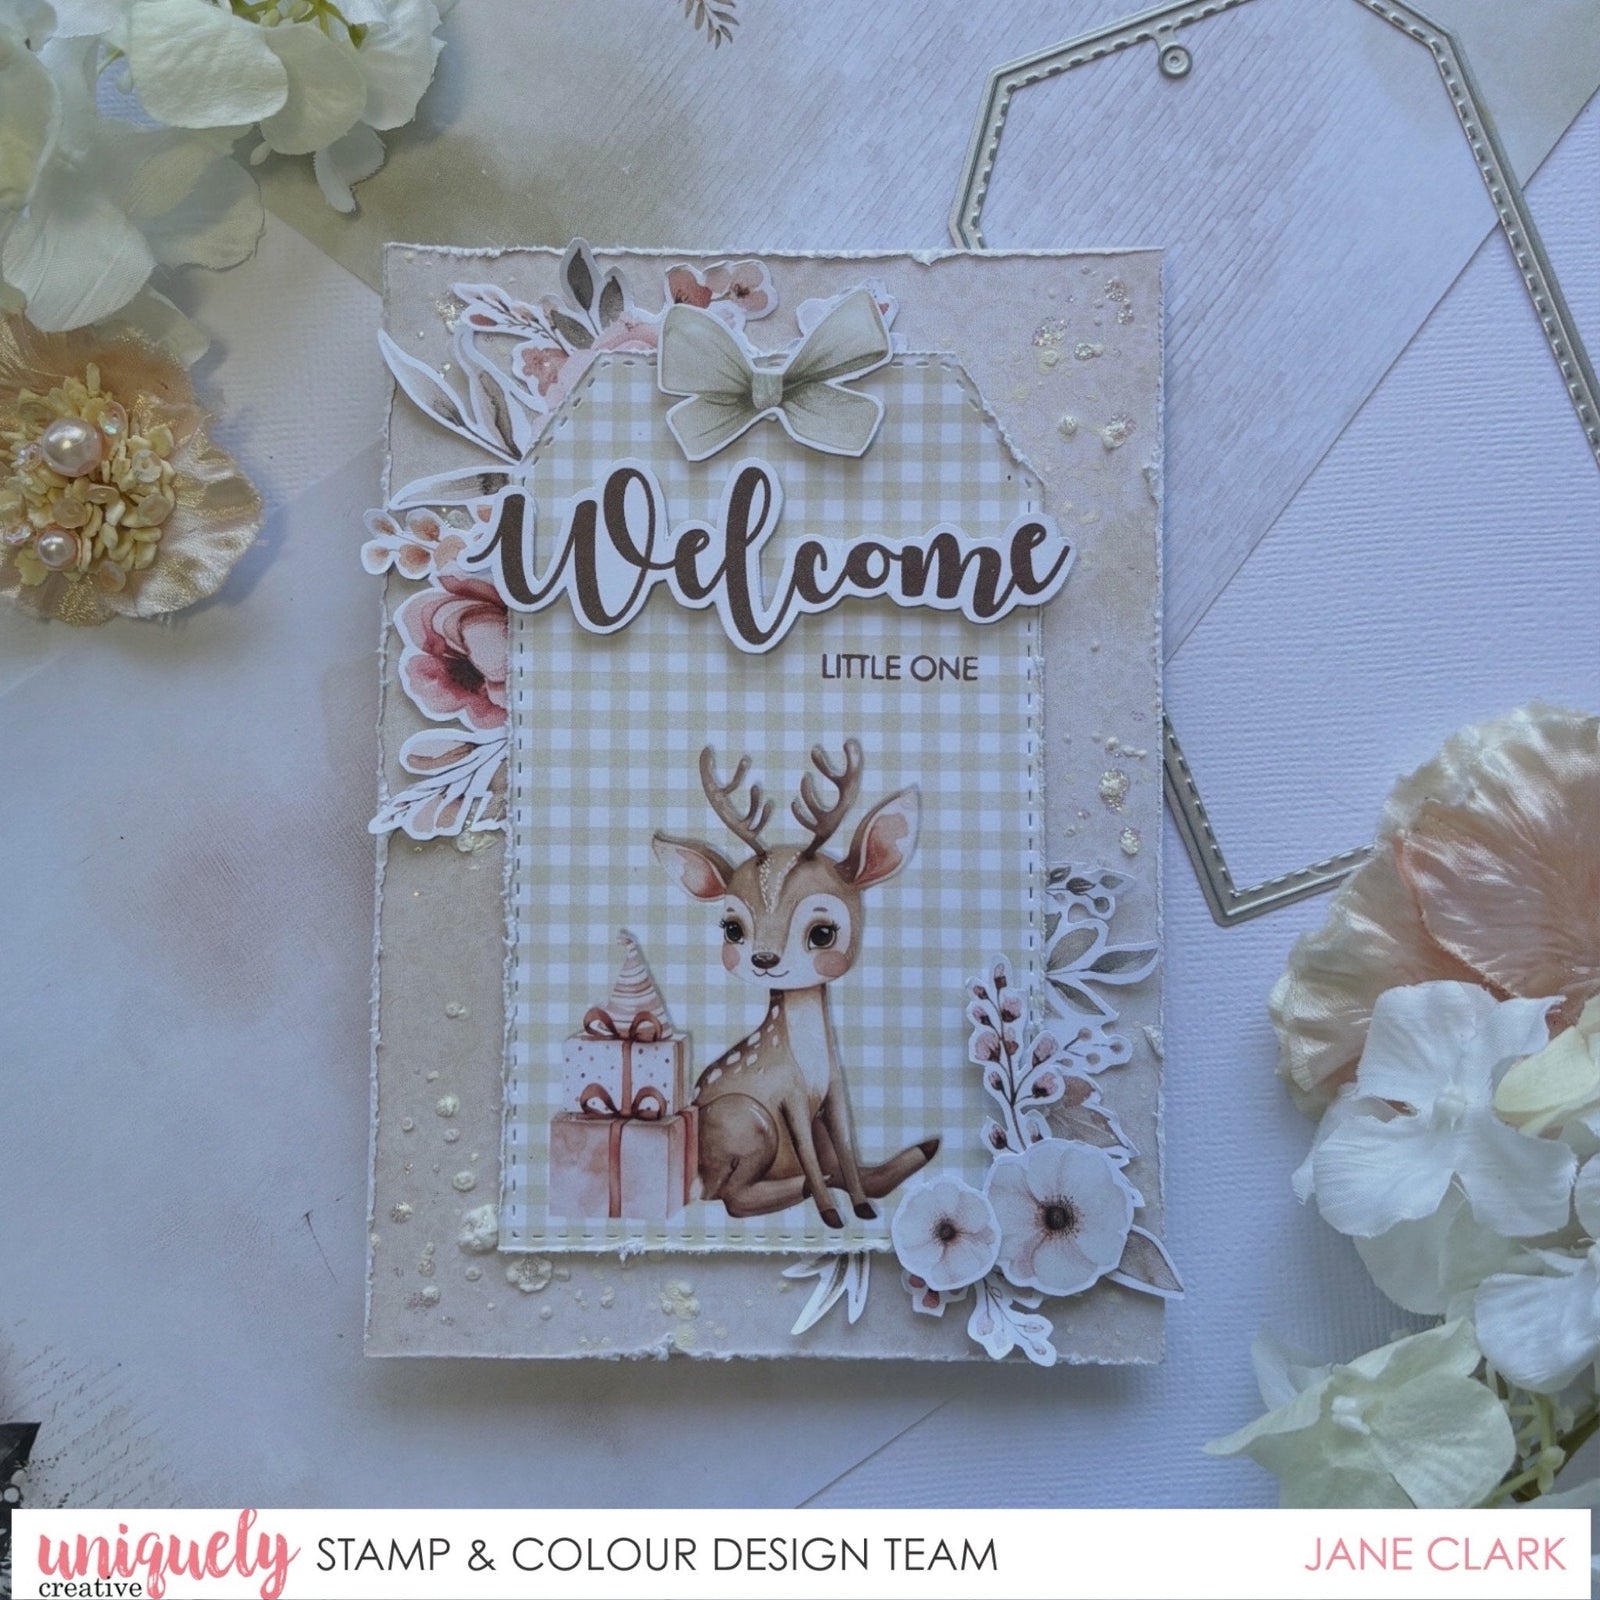
WELCOME TAG CARD TUTORIAL - JANE CLARK

To recreate this adorable card created by Design Team member Jane Clark you will need the products listed below:
Uniquely Creative Products Used:
- UC1925 Hello Darling Stamp & Die Set
- UCCS171 Hello Darling Cut-a-part
- UCP2869 Hello Darling 6x6 Collection Pack
- UCE1811 Rectangle Cards & Envelopes
- UCD1858 Stitched Essential Tag Die
Other Products Used:
- Edge Distressing Tool
- Distress Oxide Ink Scorched Timber
- Glitter Glue
- White Paint
- Tim Holtz Distress Splatter Brush
Card Size: 150mm x 210mm
Instructions:
-
Trim the beige 6x6 paper to 150mm x 105mm, distress the edges. – See image 1

-
Flick white paint over the beige panel using Splatter brush, add glitter glue over the paint splatters and a few areas around the edges of the panel. See Image 2

-
Cut the bow and Welcome from the 6x6 paper. See Image 3

-
Cut the large flower bunch and three small floral images from 6x6 paper. Trim the large flower bunch into two sections as shown – See image 4

-
Die cut the tag with deer image from Cut-a-part sheet using the Stitched Essentials Tag Die. Distress all the edges. See Image

-
Attach the two cut flower sections to the panel as shown using glue. See Image 6

- Secure the tag and other elements to the panel using foam mounting tape, adhere the piece to the front of rectangle card.
