INTERNATIONAL SHIPPING AVAILABLE, RATES CALCULATED AT THE CHECKOUT - 30 day change of mind returns
INTERNATIONAL SHIPPING AVAILABLE, RATES CALCULATED AT THE CHECKOUT - 30 day change of mind returns
Add description, images, menus and links to your mega menu
A column with no settings can be used as a spacer
Link to your collections, sales and even external links
Add up to five columns
Add description, images, menus and links to your mega menu
A column with no settings can be used as a spacer
Link to your collections, sales and even external links
Add up to five columns
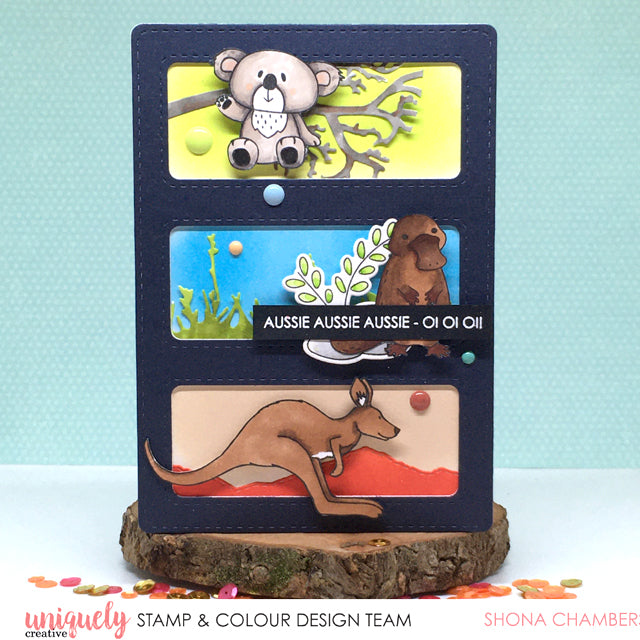
Aussie, Aussie, Aussie - Shona Chambers
July 26, 2020 3 Comments

Card Size 6" x 4 1/4"
Uniquely Creative Products Used
My Platypus Stamp Set, My Platypus Fussy Cutting Dies, Billabong Die, UNIQOLOUR Watercolour Brush Markers, Stitched 3 Window Frame Die, Round Branch Window Dies, Stitched Mountain Range Dies, Good Onya stamp set, G’Day Mate stamp set, Succulents Enamel Dots, Mermaid Enamel Dots
Other Products Used
White cardstock, black cardstock, Gina K Amalgam Black ink, X-Press It Foam Tape, Double-sided tape, Ranger White Embossing Powder, Distress Inks – Twisted Citron, Mermaid Lagoon, Barn Door, Ripe Persimmon, Mustard Seed; Waffleflower ‘Coffee Loves Milk’ ink, Navy cardstock
Colours Used
Altenew Artist Markers:
Greens – G804, G825, G915
Browns – Y821, Y911, Y932, R056
Greys – WG01, WG03, WG05
Black
Peach – R101
Instructions
1. Stamp the images from the My Platypus and Good Onya stamp sets, colouring with Altenew Markers and UC UNIQOLOUR Watercolour Brush Markers and fussy/die-cutting out. Repeat with the koala from the G’Day Mate stamp set.

2. Die cut the Billabong Die from white cardstock, and colour roughly with Altenew Markers and cut off the frame. Die-cut the Round Branch Window Die from white cardstock, cut the branch out of the frame and use Grey Altenew Markers to colour it.

3. Die-cut the Stitched 3 Window Frame Die once from Navy cardstock, twice from white cardstock and glue together. Die-cut one of the Stitched Mountain Range Dies from white cardstock and blend Distress Inks Barn Door, Ripe Persimmon and Mustard Seed to give them an ‘Australian Desert’ look.

4. Using a pencil, trace the three windows on the card front and blend the three background colours, keeping within the window area.

5. Using some glue, adhere the branch, mountains and reeds to the card front and then glue the window frame over top.

6. To complete the card, pop the animals up on foam tape in each window. Heat emboss the sentiment from the My Platypus stamp set on black cardstock and glue in place. To finish off, add some co-ordinating enamel dots.

3 Responses
MOmJtAjL
July 27, 2020
NRmJdflc
Dhruvika Raj
July 26, 2020
Shona.. Thats an awesome card, three scenes in one.. The contrast in each frame is super treat to the eyes.. I love the beautiful tutorial that you’ve penned for us.. Looks very beautiful 😍
Leave a comment
Newsletter
Join our mailing list and never miss an update …

xpPrqaLJdgVbnoN
July 27, 2020
IDaOTYJyfEmGedt