Country Roads Birthday Cards - Candy Chelepy
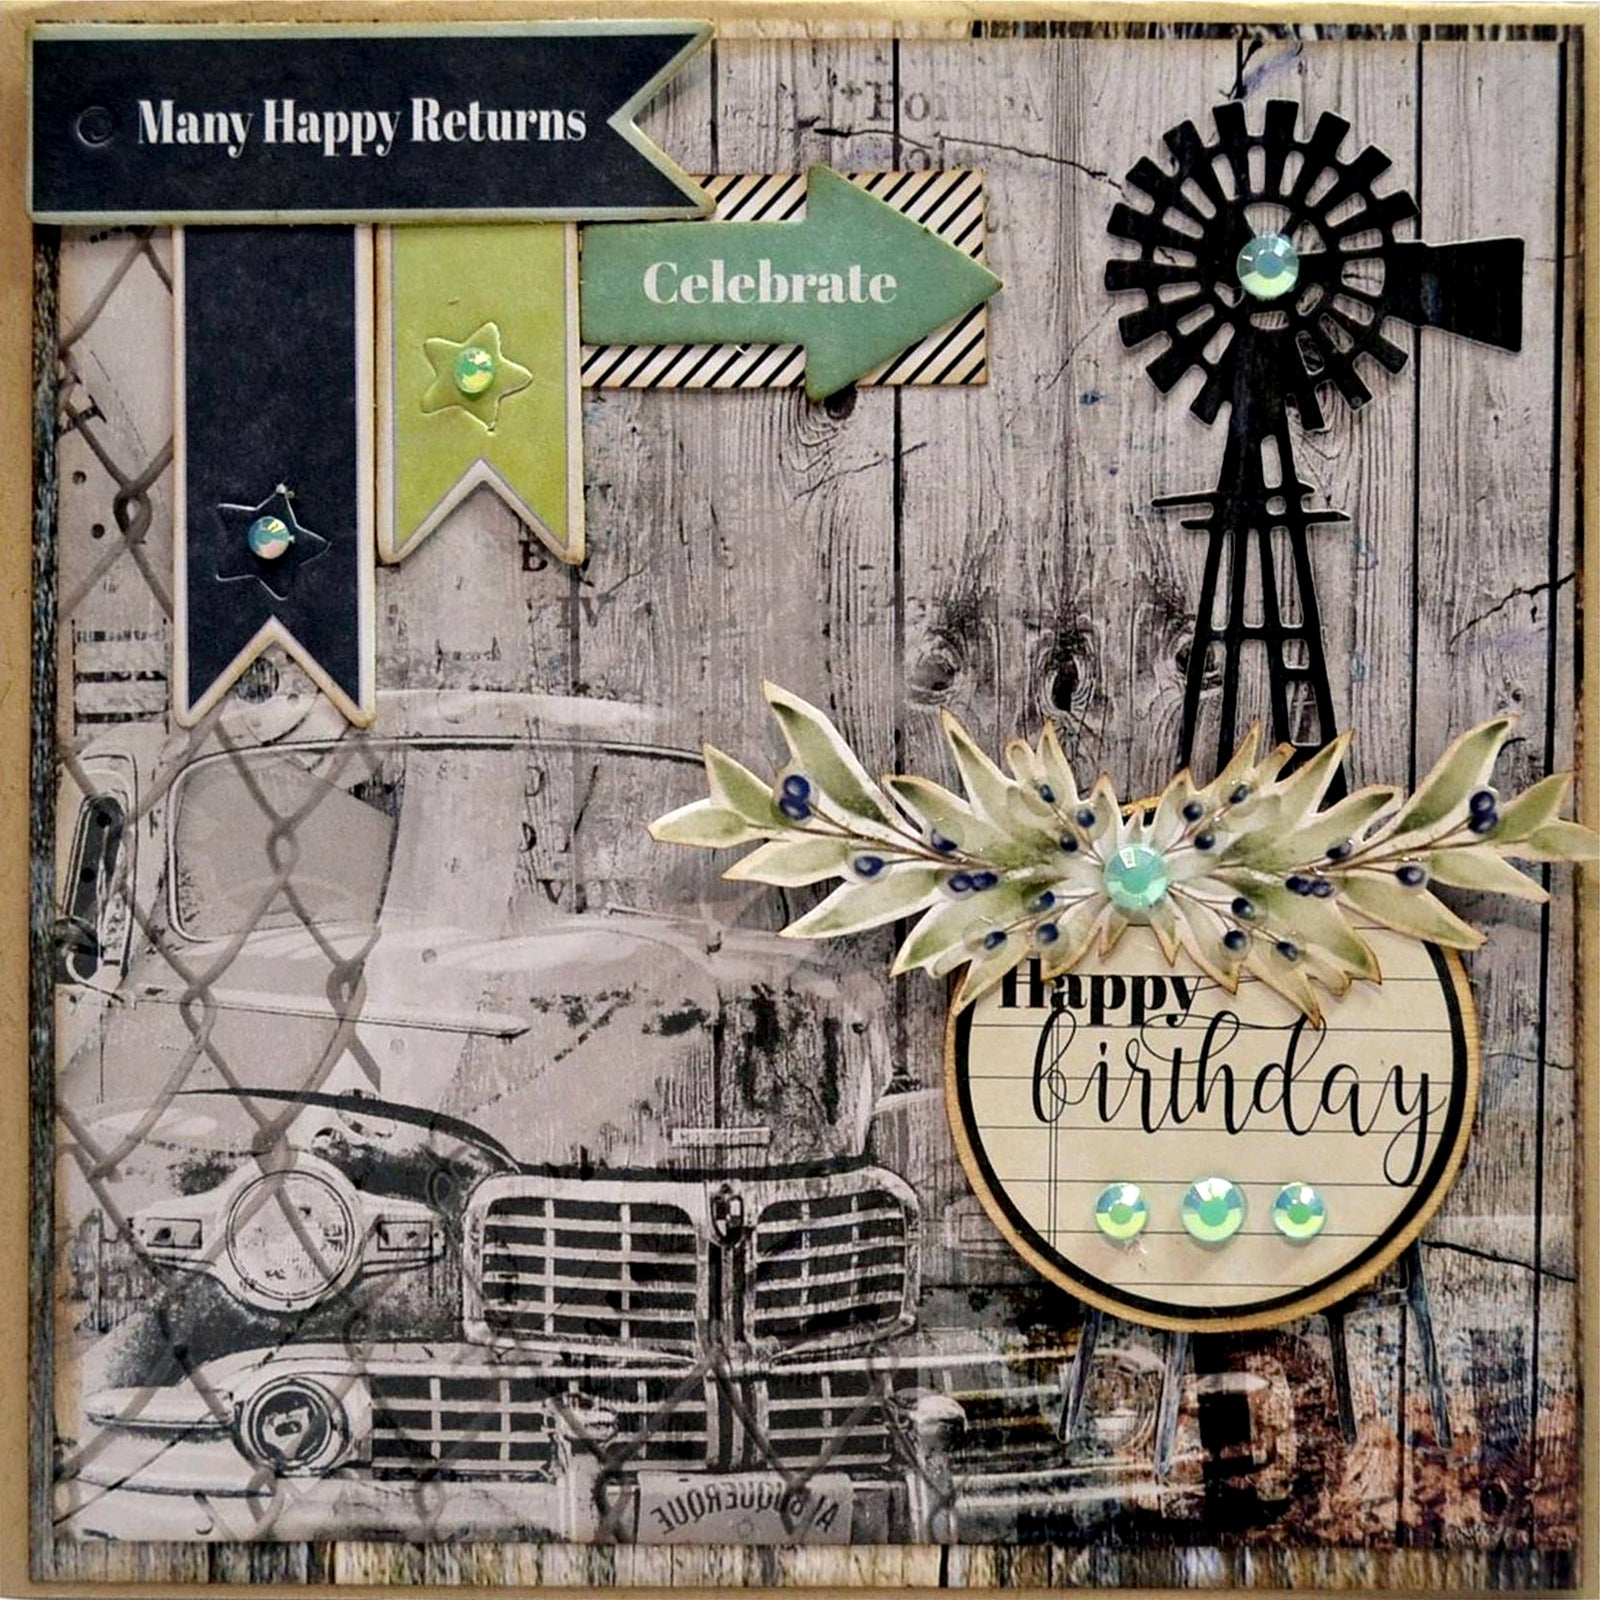

Card 1: Many Happy Returns (Main Image)
Uniquely Creative Products Used
UCP2152 The Back Paddock, UCP2158 Everyday Memories, UCP2159 Be Awesome, UCL1706 Country Roads Laser Cut, UCP1963 Windmill Die, UCP2160 Country Roads Creative Cuts, UCR1734 Mint Rhinestones, Kraft Cardstock
Other Products Used
Trimmer, scoring board, double sided tape, glue, scissors, Walnut Stain ink, dimensional magic, die cutting machine
Instructions
1. From the Kraft cardstock cut at 6 inches, you will then have 2 (6x12) inch pieces for your card bases. Score and fold in half. Use one for this card.
2. Cut The Back Paddock pattern paper (the ute pattern side) at 5 ¾ x 12 inches. Cut the top of this piece at 5 ¾ x 5 ¾ inches. You will have a square for the card base. Now cut the bottom piece with the ute on it at 5 ¾ x 5 ¾ inch square. Ink all around the edges of both of these pieces with your brown ink.

3. Using the scrap piece of Back Paddock, die cut a windmill. Fussy cut the leaf image from the Everyday Memories pattern paper.

4. From the Country Roads Laser Cut, pop out the circle with the spanner inside it and find the Happy Birthday sentiment from the Creative Cuts. Locate all other Creative Cut die cuts as pictured below. Cut the black and white rectangle from the Awesome pattern paper.

5. Using tape, adhere the ute pattern paper to the larger pattern paper. Now adhere flat to the card base. Using a fine tip on your glue, adhere the windmill to the right side of the paper, ensuring the darker side is showing.

6. Ink around all other embellishments and adhere to the card front. Glue the round Happy Birthday circle on top of the round wood piece. Add glue to the bottom of the wood piece and place on your card. Adhere the leaf piece to the top of the circle. Add the banners to the top left side of the card.
7.Add some mint Rhinestones to the centre of the windmill, birthday sentiment, leaf spray and the middle of each star in the banners. Add some dimensional magic to the blue berries on the leaf spray to complete the card.
Card 2: Hey Happy Birthday

Uniquely Creative Products Used
UCP2154 The Original Fussy Cuts, UCP2159 Be Awesome, UCP2160 Country Roads Creative Cuts, UCE1734 Mint Rhinestones, UCE1810 Burlap Sheet, Burlap Ric Rac, Country Roads Cut-a-Part Sheet
Other Products Used
Kraft cardstock, trimmer, scoring board, scissors, glue, double sided and foam tape, die cutting machine, dimensional magic, brown ink
2 Responses

Debra Coughlan
February 28, 2021
Beautifully created Candy and it was so lovely to see the actual cards this morning too