THE RULE OF THIRDS: HOW TO USE IT IN YOUR SCRAPBOOKING LAYOUTS

When creating a scrapbook layout, employing certain design concepts can ensure your page is visually pleasing and has a natural flow and balance. One such technique is the Rule of Thirds.
In this article, we'll explain the Rule of Thirds and provide a step-by-step guide to using this technique in your scrapbook layouts.
What is The Rule of Thirds?
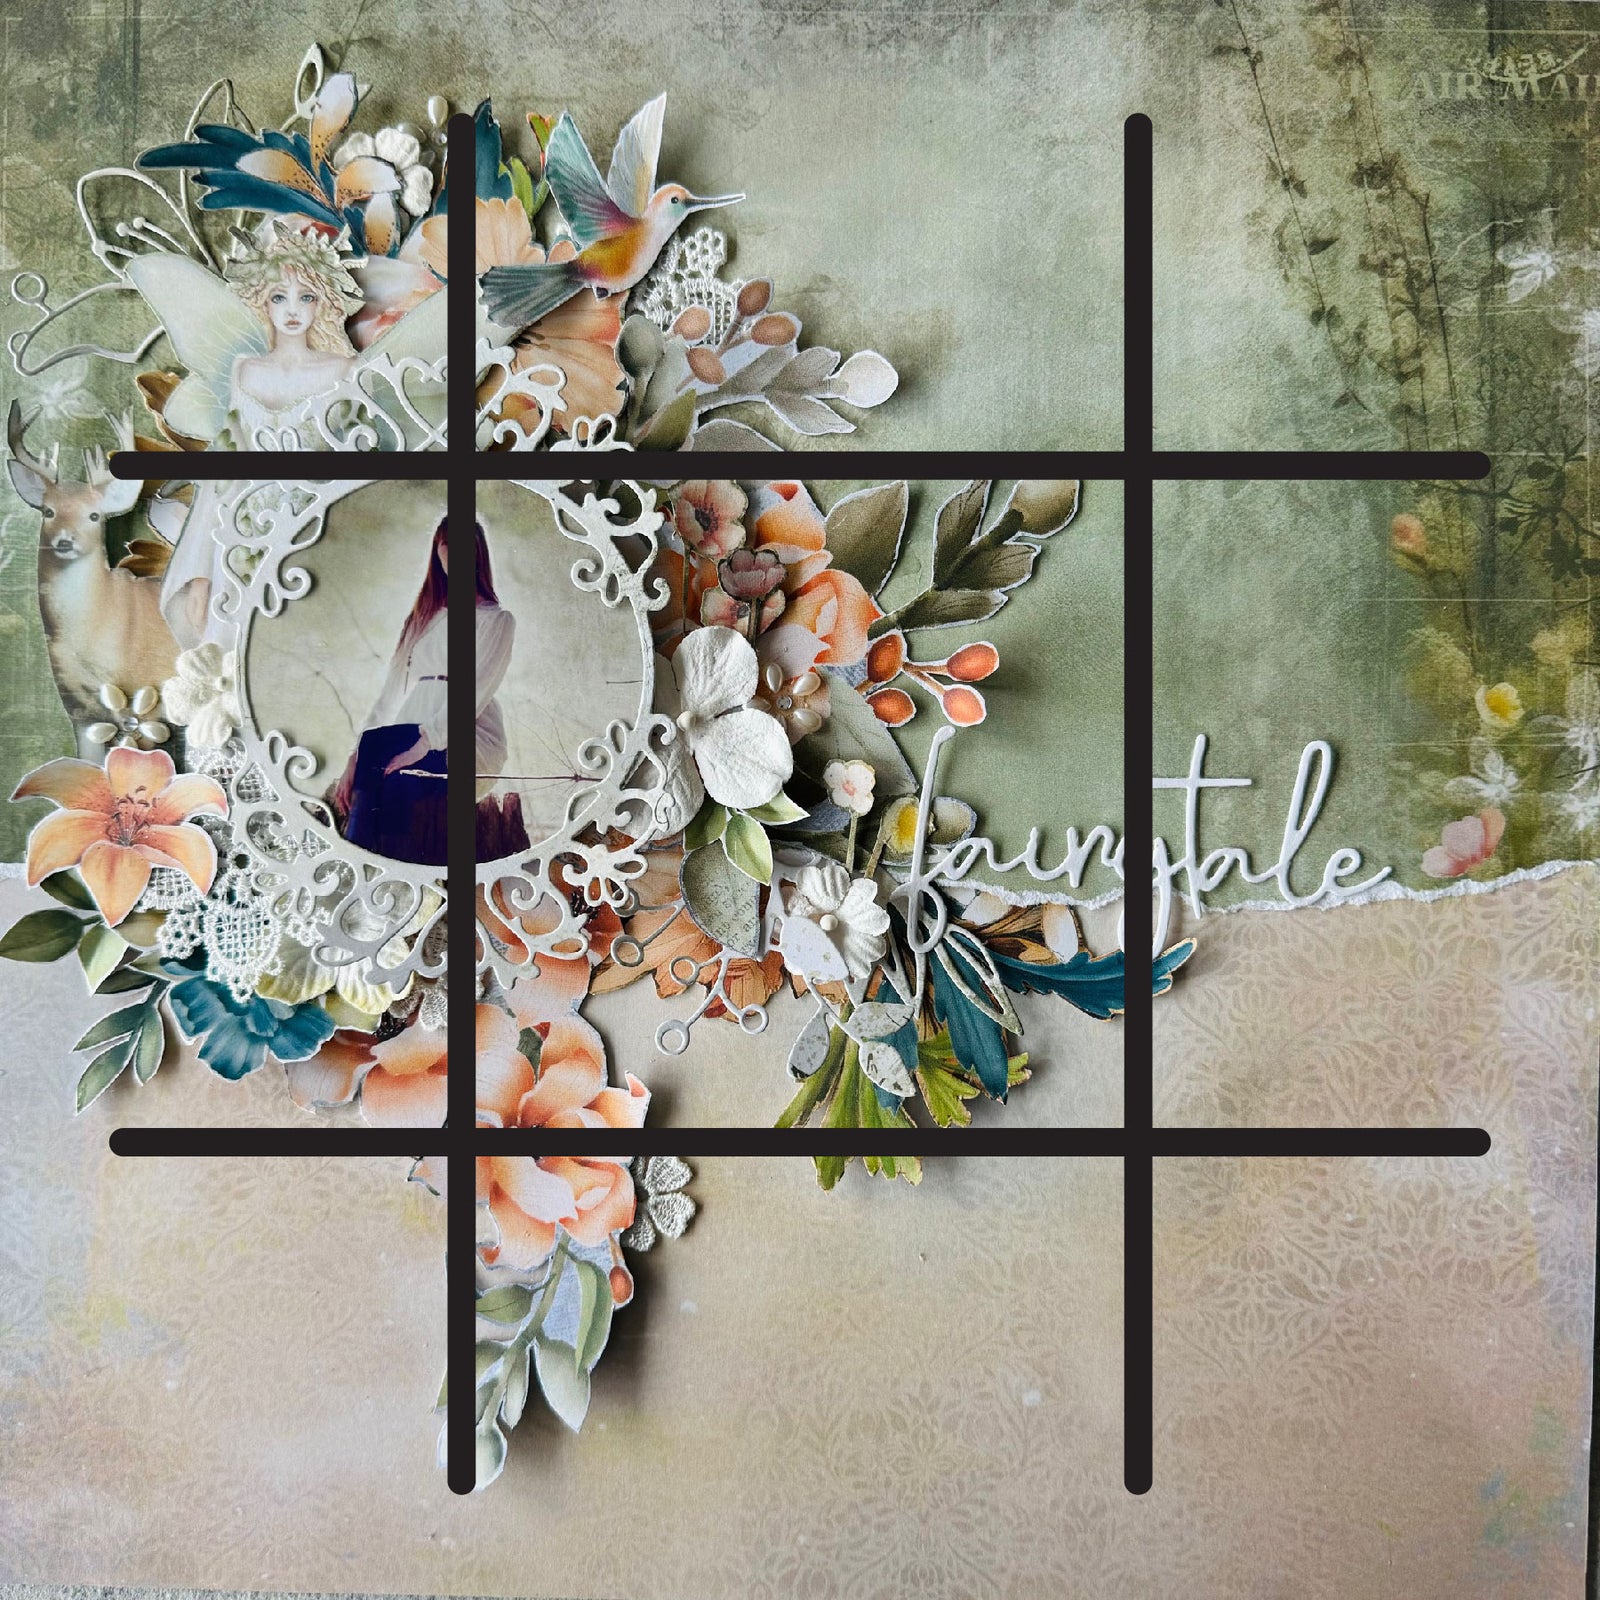
The Rule of Thirds is a design concept which enables you to build a design by focusing on different sections created using a grid. This grid consists of three evenly spaced rows and columns to make nine equal sections.
Using the Rule of Thirds grid helps to take the guesswork out of planning your design and helps you to determine where to position your key elements.
Placing your elements on the lines or at the intersecting points of the grid draws the eye to the focal point of your design, thus making your design more interesting and dynamic.
How to Use The Rule of Thirds in your Scrapbooking Layouts
Do you sometimes feel dissatisfied with a layout, sensing a lack of balance or an unclear focal point? The Rule of Thirds can help. It's simple to learn and easy to use, enabling you to create stunning layouts consistently.
This method acts as a guide to help you arrange all of the elements on your layout. You can use it to help you align the text, position the photos and add all of your embellishments.
Following this rule ensures your photo remains the primary focal point, with embellishments and text serving as secondary focal points. This creates a visual triangle, adding interest and flow to your design.
Step-by-Step Guide To Creating a Layout Using The Rule of Thirds
Follow these simple steps to design a scrapbooking layout using the Rule of Thirds:
Step 1:
Gather all of your supplies including your photo, your background paper and any embellishments that you wish to use.

Step 2:
Lay your background paper down and then imaging the rule of thirds grid laying over your background page.
Step 3:
Decide where to place your photo, ideally on one of the four intersecting points of the grid.
Step 4:
Start to place your embellishments down, keeping the placement along the lines of the grid.

Step 5:
Adhere your photo to the layout on top of your embellishments.
Step 6:
Add any sentiments or a title to your layout, this can be added along one of the horizontal grid lines, and now your layout is done!

For further information and a visual representation you can take a look at the video below:

Incorporating the Rule of Thirds into your scrapbooking can elevate your designs, making them more balanced, dynamic, and visually appealing. This effective technique will help you create layouts with clear focal points and a natural flow. So, gather your supplies, follow the steps, and see how the Rule of Thirds can transform your scrapbooking layouts!
Janet
August 26, 2024
Thanks very informative, I’ve managed well before, but this now makes it quicker and less likely to make the page uneven
Saves me time